Guide · Card Crafting
Recipe crafting, recipe by recipe
Partway through Act 1 the full release teaches you to craft brand-new cards: pick a recipe, place Iota on its grid, and the game builds a card that didn’t exist before. This guide follows the system exactly as the launch-day stream meets it — the unlock, the placement rules, and the character choice most players miss.
Sources
- [In Falsus] Stream Day 1 | Welcome to In Falsus — TrappyTheDemon
Screenshots are frames from the linked launch-day stream, credited above. System text is quoted as it appears on screen.
Placement Rules & Penalties Matrix
Avoiding Penalties on the Board
Every misplaced Iota permanently subtracts from the finished card. Understanding how each penalty triggers keeps your stats above threshold.
| Penalty Type | Trigger Condition | Stat Loss Impact | How to Avoid |
|---|---|---|---|
| Overload | Exceeding maximum board Iota capacity | +1 Penalty (Stats drop: 1=89%, 2=56%, ≥3=0%) | Use Iris as crafter (Expanded Iota Limit core skill) |
| Out of Bounds | Pieces placed over dark unsafe background tiles | +1 Penalty per tile (Stats drop: 1=89%, 2=56%, ≥3=0%) | Keep Iotas strictly within light blank tiles and colored zones |
| Disconnected | Isolated Iotas not linked edge-to-edge to the anchor cluster | +1 Penalty (Stats drop: 1=89%, 2=56%, ≥3=0%) | Bridge distant zones using cheap 1-tile filler Iotas |
| Stack Limit Overlap | Stacking more than 3 Iotas on an identical hex cell | Cannot finalize craft (Hard validation block) | Spread pieces across empty cells; do not exceed 3 layers |
| Falsehood (Unsafe Contact) | Placed pieces that trigger critical instability or fail safety checks | Infinite penalty: card stats drop instantly to 0% | Always anchor the first piece to the designated root safe cell |
Crafting Recipes & Builds
Recommended Early-to-Late Recipes
| Recipe Name | Recommended Crafter | Build Role & Expected Stats |
|---|---|---|
| At The End | Mei / Iris | Balanced Power & Defense foundation (1,000+ stat target) |
| An Aberrant Freedom | Nia (Aggressive focus) | High single-target attack breaker for Act 1 & 2 boss encounters |
| Austere Advisor | Iris (Expanded Limit) | High stat ceiling (1,537/1,537), ideal for Remembrance farming |
Unlocking crafting
- 1
Crafting unlocks mid-story
A few hours into Act 1, right after a New Vision story dive, a banner announces Card Crafting and the game walks you through a guided tutorial craft. From that point, recipes found in story entries can be forged from the hub at any time.
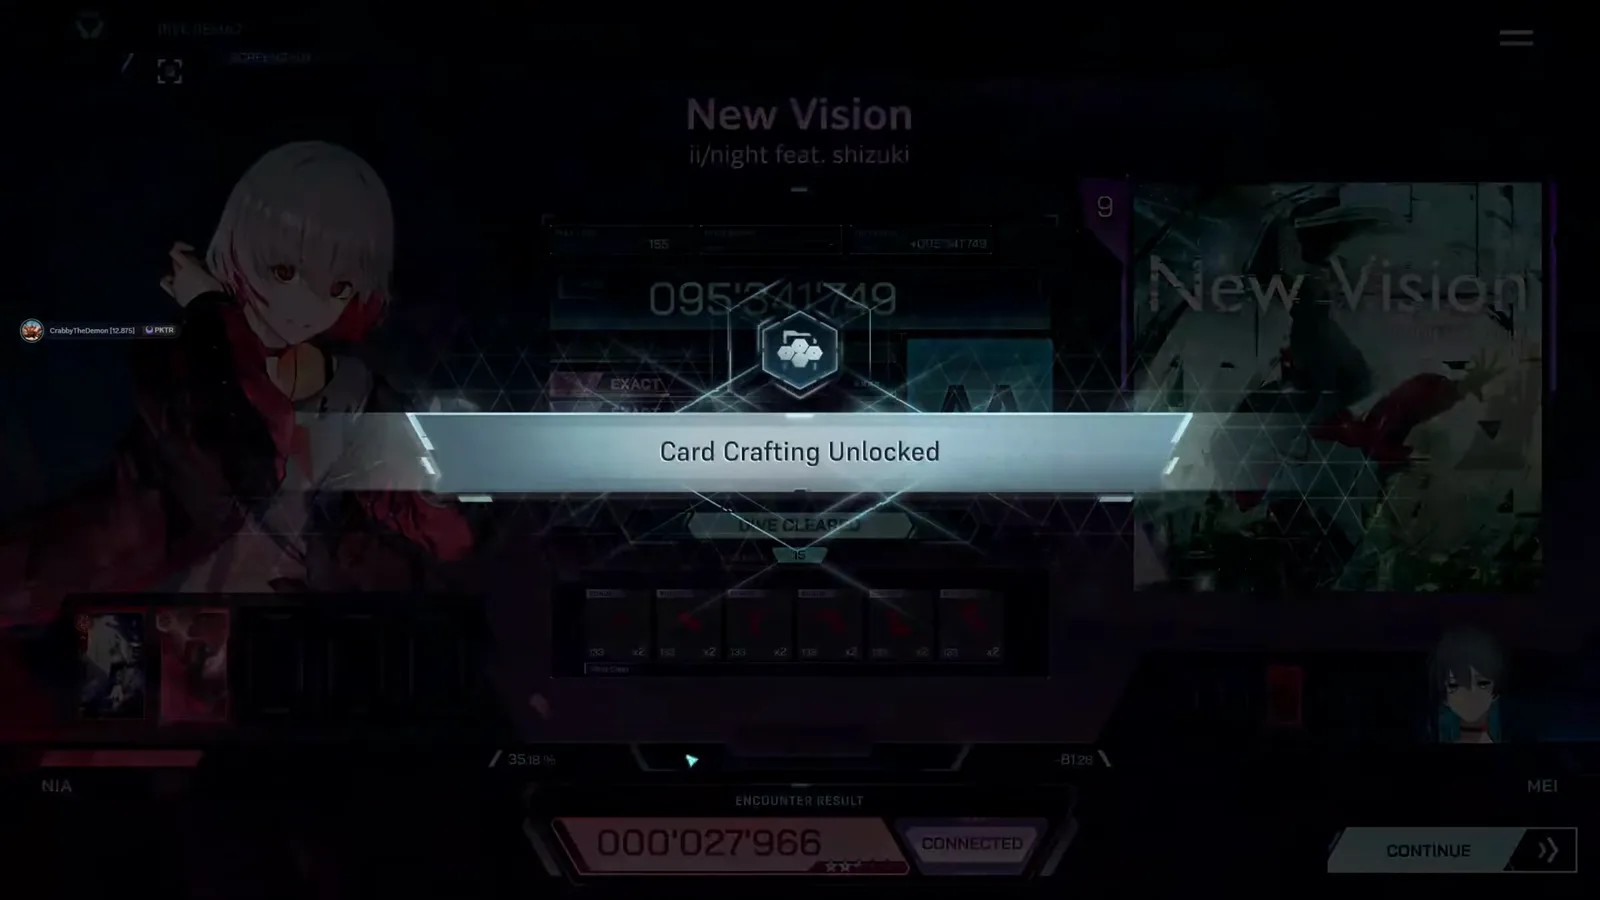
The Card Crafting Unlocked banner, straight after a dive.Watch source clip - 2
The recipe decides the card
The Recipes tab is explicit about the deal: “Create new, stronger Cards through Crafting.” Each recipe — At The End and An Aberrant Freedom in the first hours — defines exactly which card a successful craft produces, so hunting recipes in story entries is hunting cards.
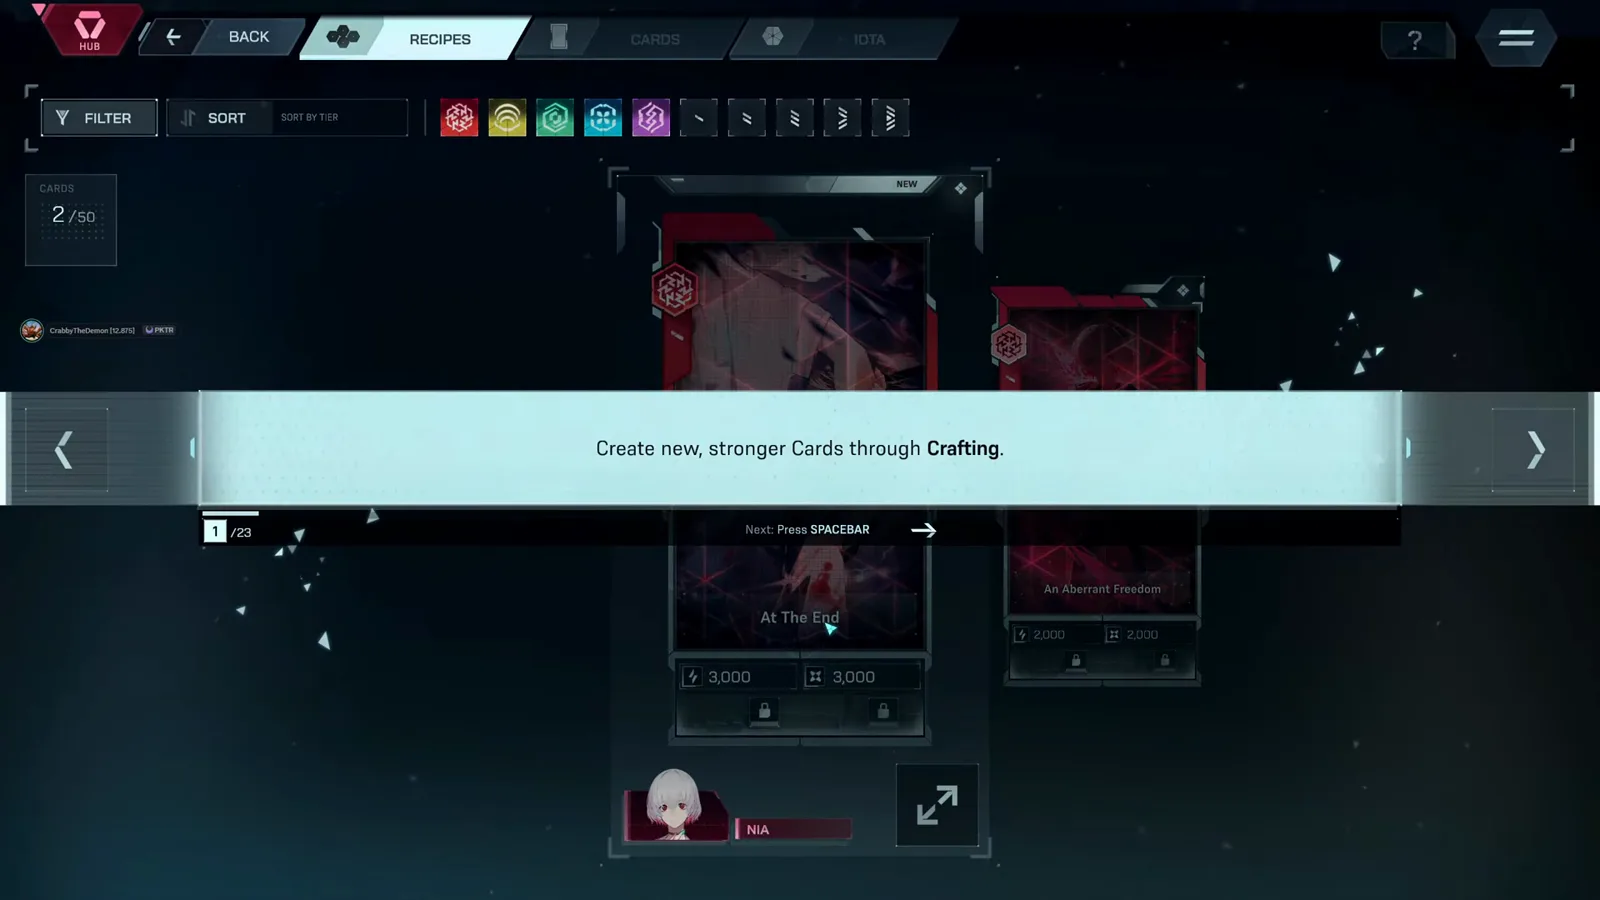
The Recipes tab: two recipes, two future cards.Watch source clip
Crafting a card, step by step
- 3
Open a recipe and start the puzzle
Selecting a recipe opens its crafting board: the card preview on the right, base stats on the left, and the hex grid in the middle. A prompt tells you to click to begin, and the board waits for your first Iota.
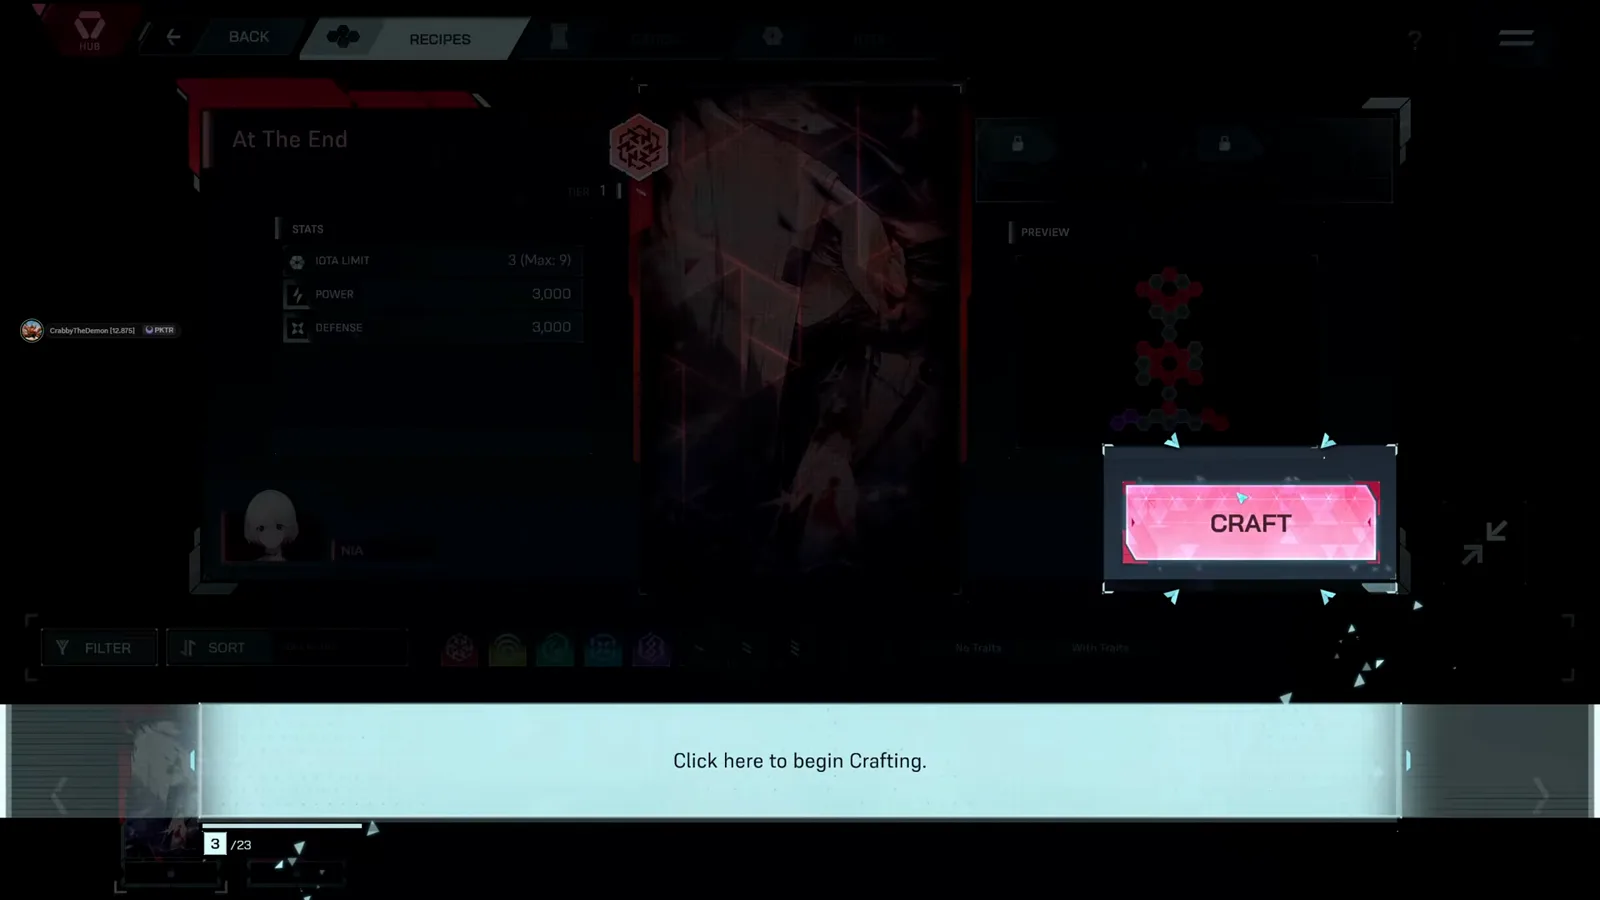
At The End’s board, ready for the first Iota.Watch source clip - 4
Place Iota to fill the colored zones
Placement is a tiny puzzle: “Iotas are placed in the grid to fill in Colored Zones.” The tutorial has you place, delete and re-place freely, and it teaches the first boundary the hard way — push a piece outside the outline and the board flags Out of Bounds.
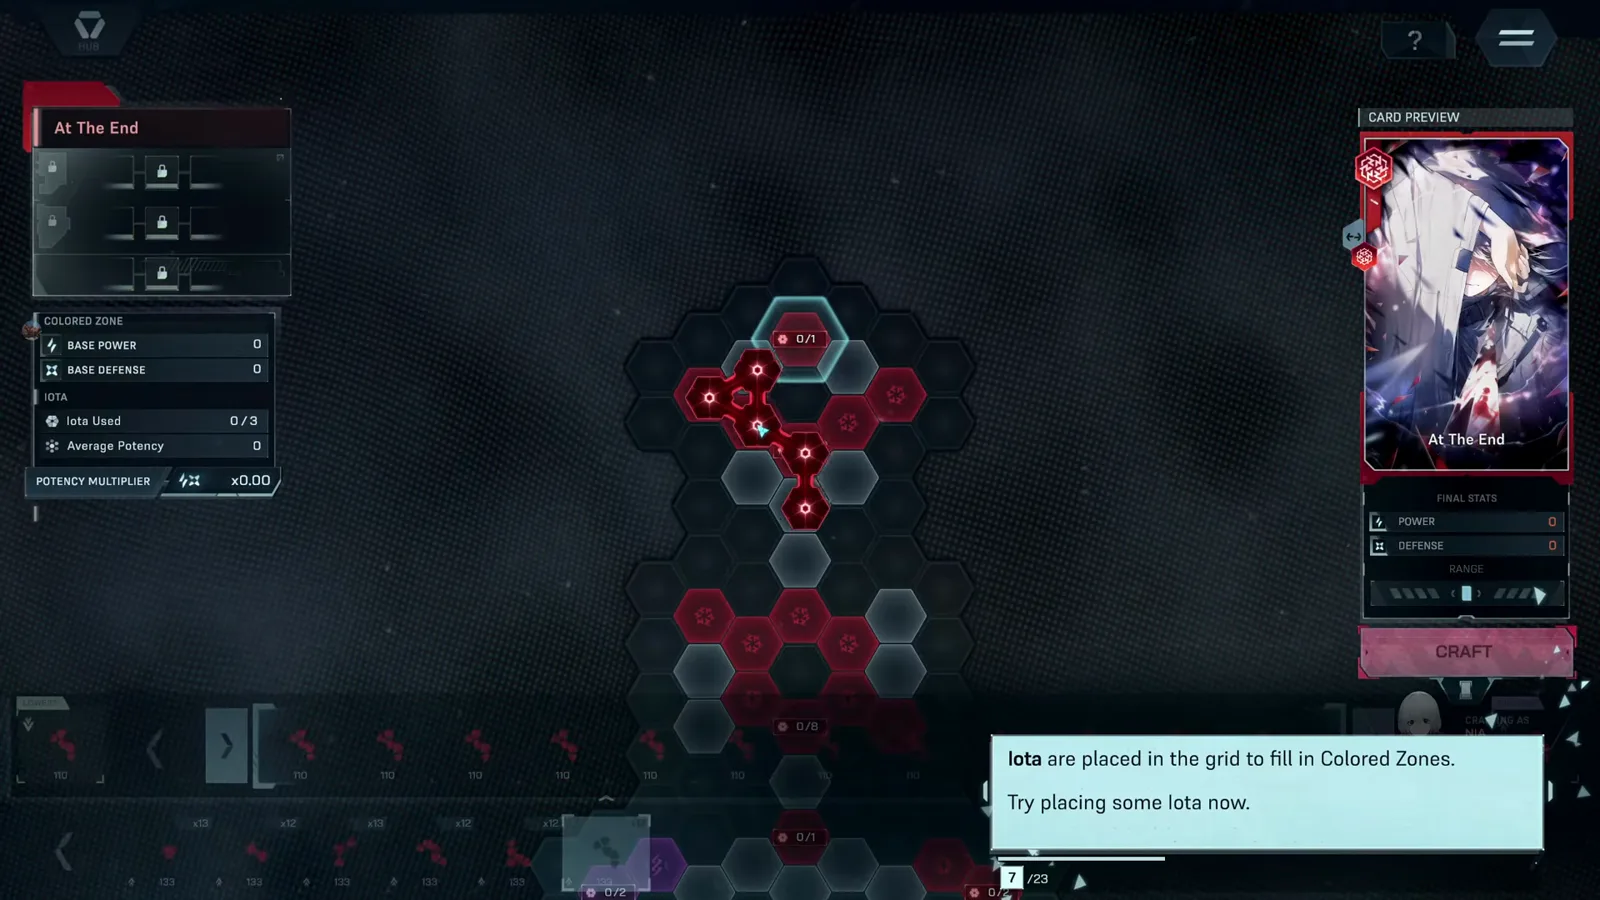
The placement tutorial — and the first Out of Bounds warning.Watch source clip - 5
Read the board before you commit
A finished placement shows everything at once: the Penalties tally on the left, the Potency Multiplier, and the card preview with its final Power and Defense — An Aberrant Freedom’s tutorial craft lands at 1,030 / 1,058. If the numbers look wrong, rearrange before you hit CRAFT.
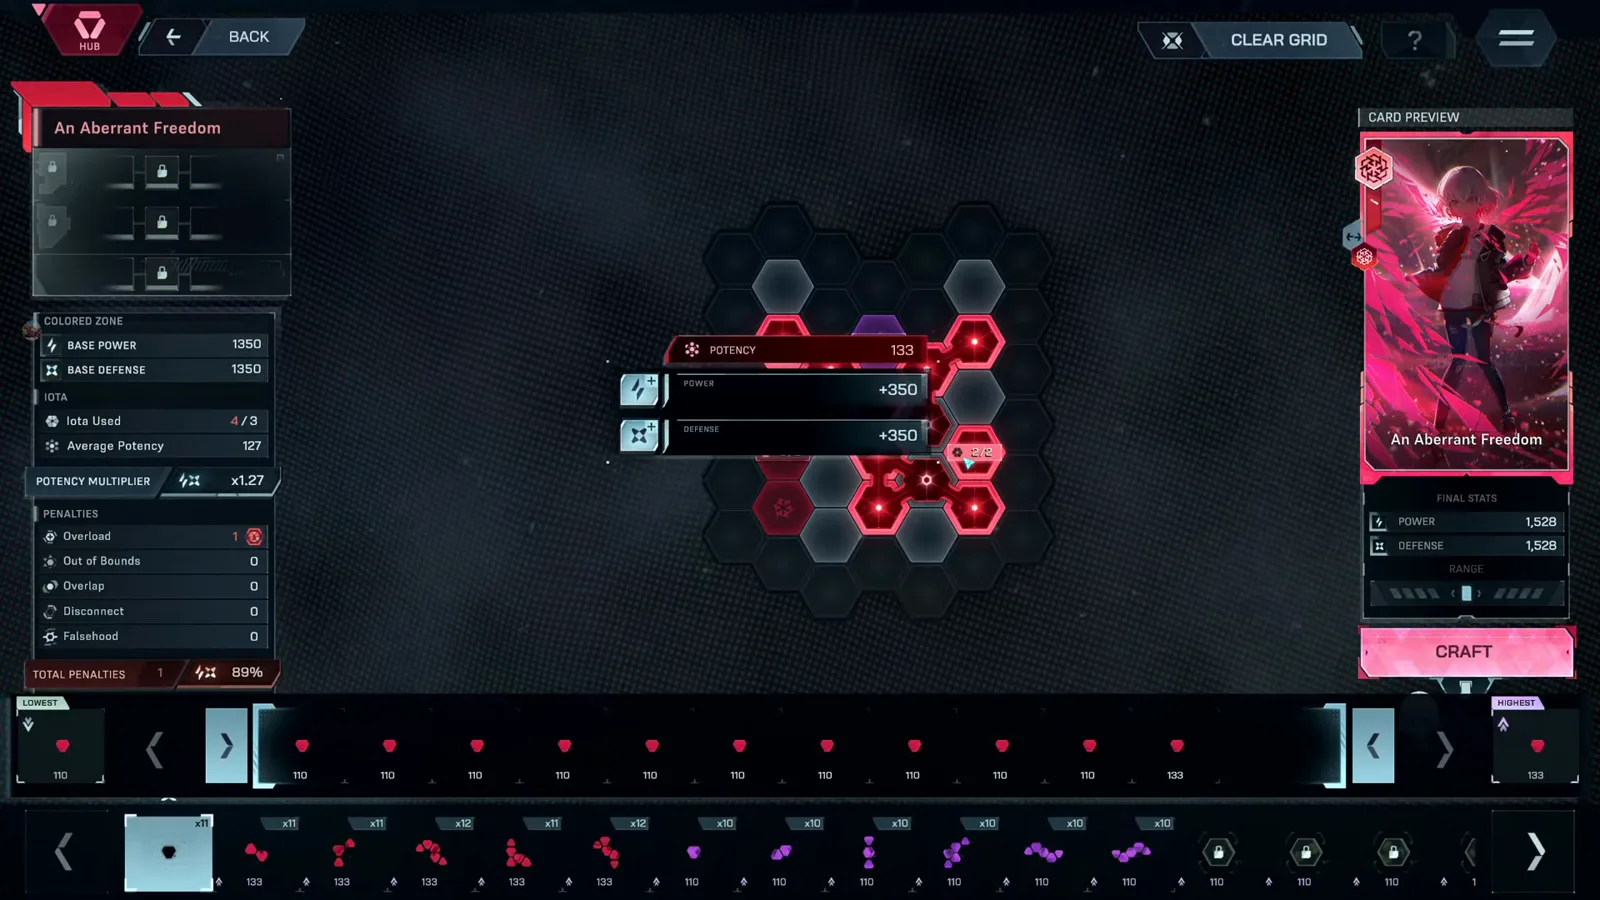
An Aberrant Freedom at 1,030 / 1,058, penalties visible.Watch source clip
The rules that make or break a card
- 6
Finalize shows what the craft keeps
Committing a craft opens a Finalize Card preview. Early recipes show “NO TRAITS AVAILABLE — there are no Traits to choose from with this recipe” and “Color Change not available for this Card” — the basics are locked in, and fancier options arrive with later recipes.
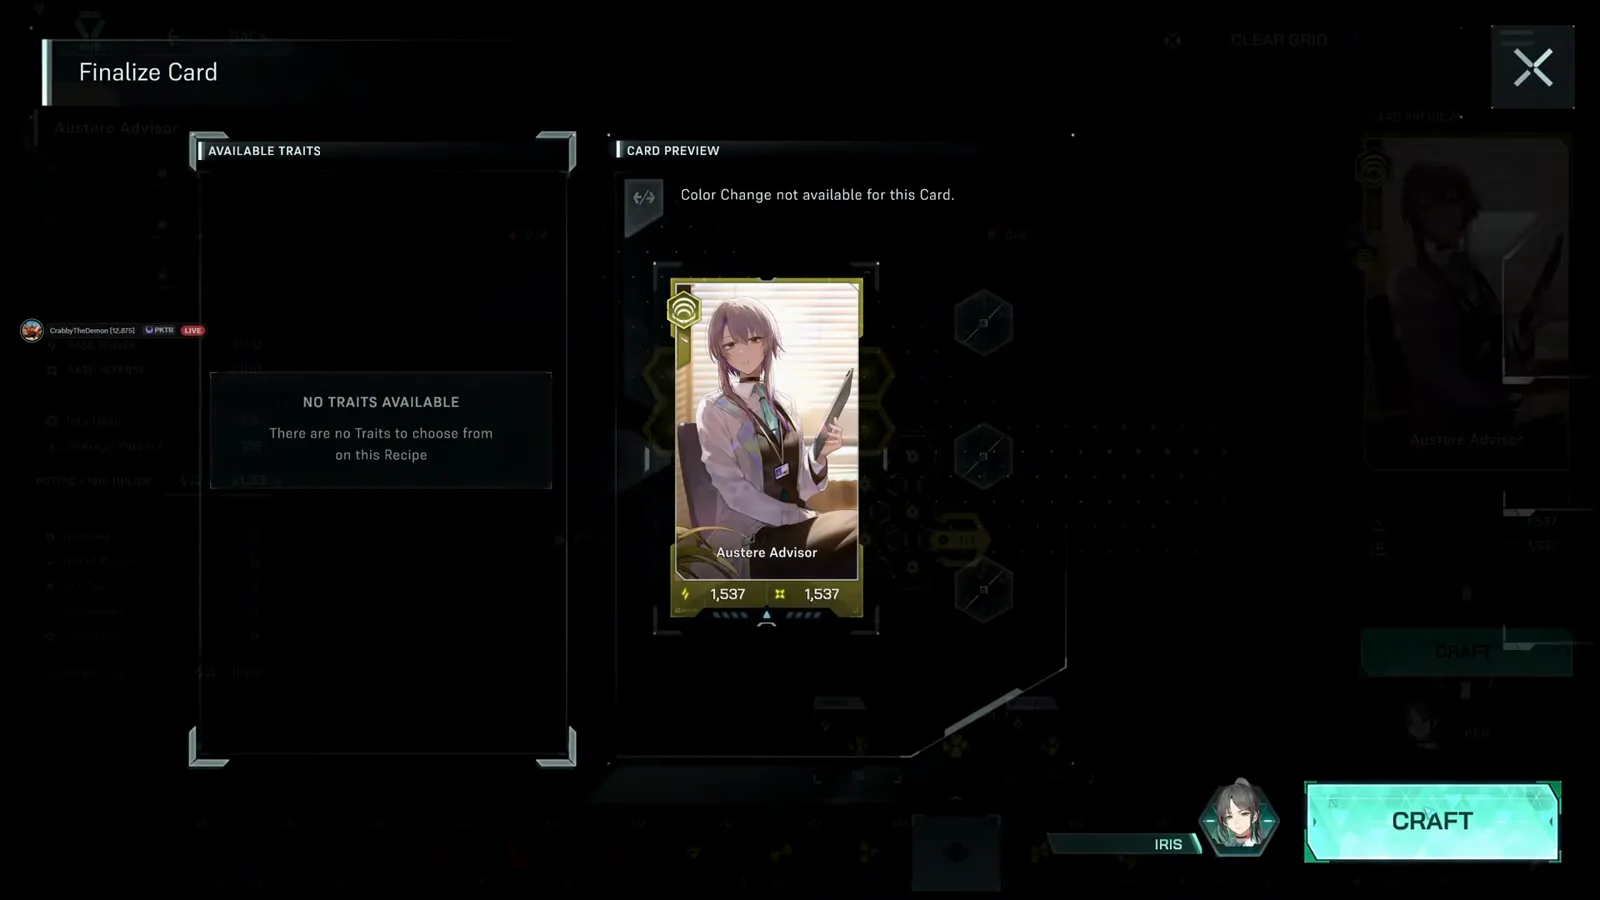
The Finalize Card preview: no Traits, no color change.Watch source clip - 7
Pick the right girl before you craft
Crafting is character-bound, and the launch-day run learned it live: “Does it matter who I craft the cards with? Actually, crafting as Iris…” Each girl’s skills shape what a craft produces — Iris’s kit includes Expanded Iota Limit and Incremental Tolerances — so switch crafters before placing pieces, not after. The Austere Advisor craft below lands at a clean 1,537 / 1,537.
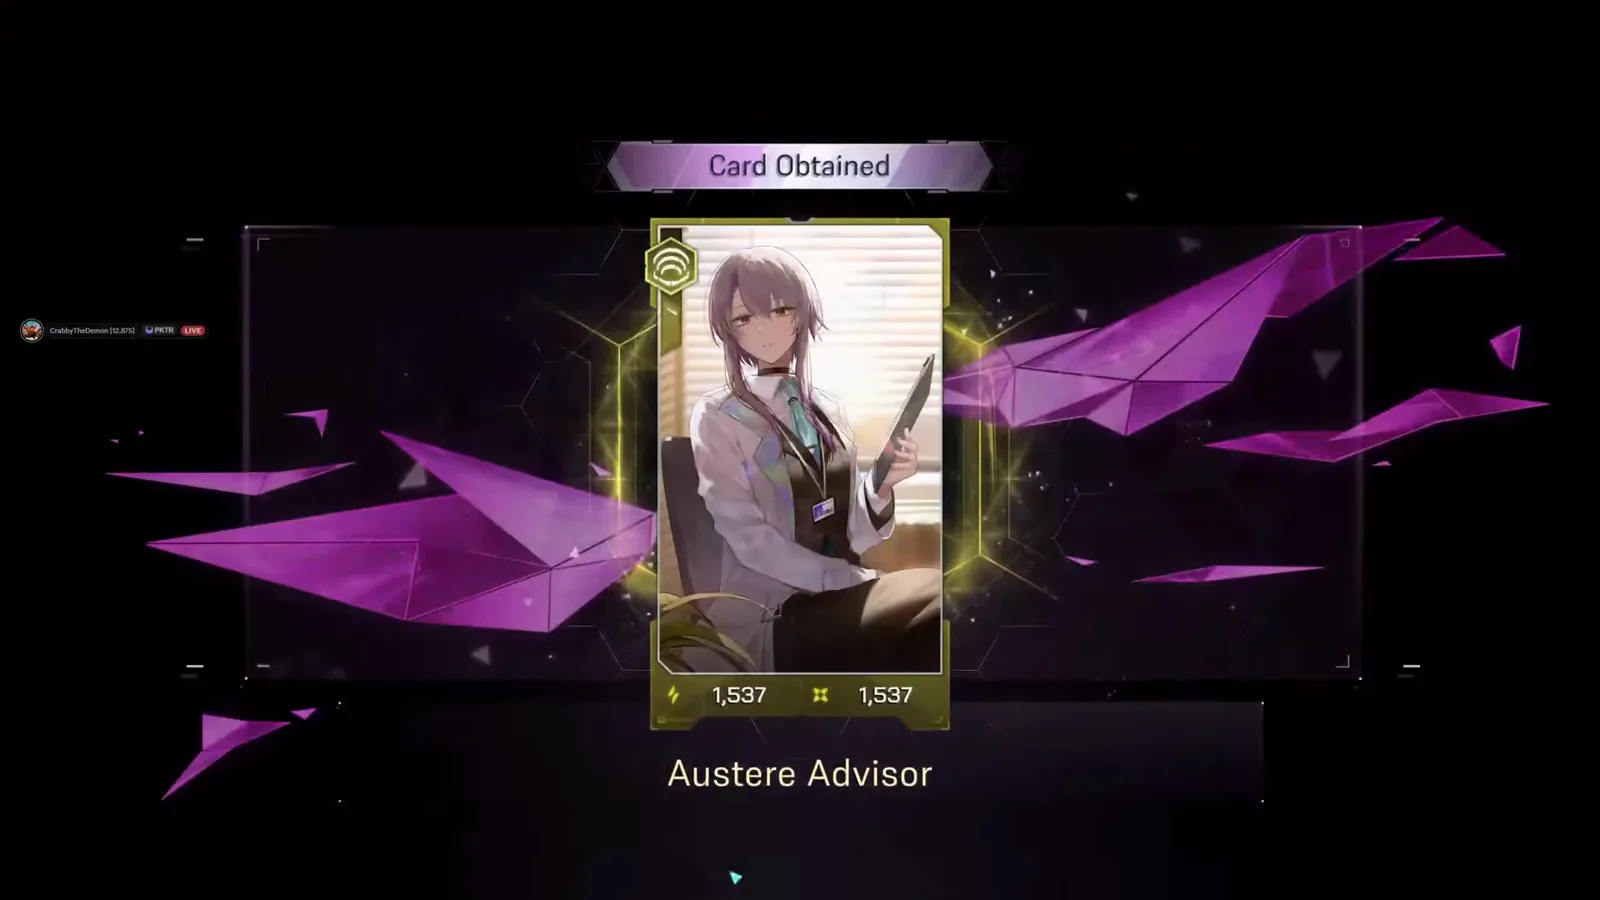
Austere Advisor, crafted under Iris: 1,537 / 1,537.Watch source clip - 8
Learn the five penalties once
The game teaches placement penalties with tooltips worth reading once: Out of Bounds Penalties apply per Iota in a pink-marked zone, and each Iota can give at most one penalty. The full family — Overloaded, Out of Bounds, Disconnected, Overlap and Falsehood — is catalogued in our Integration wiki; the crafting twist is that penalties subtract from the exact card you’re building.
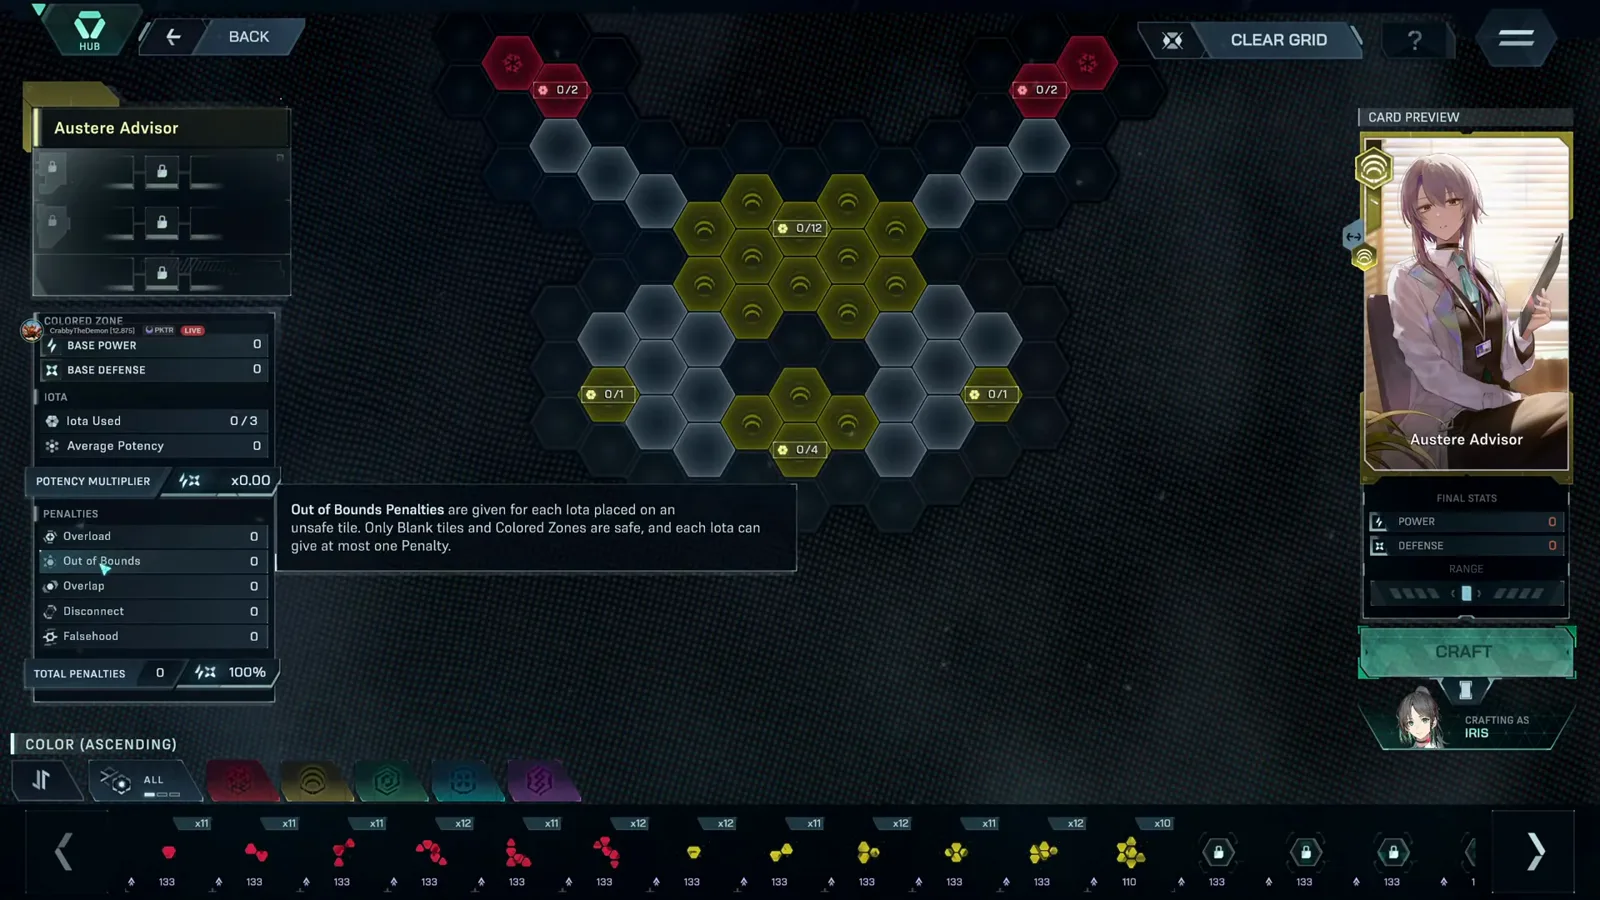
The Out of Bounds Penalties tooltip, verbatim.Watch source clip
Card mastery challenges
v1.0.3+ VerifiedEvery card sits on a three-step track: In Discovery, then In Mastery, then Mastered. Mastery challenges are the game's way of moving cards along that track — each asks for a specific craft, and they feed the three Grandmastery Challenge achievements that sit under 0.1% of players.
The challenges are still being tuned: the official v1.0.3 patch notes (September 11, 2026) list an adjusted threshold for one Crafting mastery challenge. If a challenge felt impossible at launch, re-read its requirement text in-game after updating before you spend Iota on it.
A community tip circulating among players (not verified in-game by us): for challenges, craft power- and defense-oriented cards and place your Iota so its exits route outward — that placement is said to extend the finished card's effective range. The crafting rules on this page still come first: out-of-bounds penalties lower the finished card, so re-check the requirement before you commit.
v1.0.3+ reproducible card mastery solutions
The official v1.0.3 patch (September 11, 2026) adjusted challenge thresholds across multiple card mastery stages. Below are 4 tested, reproducible build blueprints tested against the latest balance patch — complete with material requisites, grid layout blueprints, final stats, and challenge pass criteria.
Mastery I · Early Balanced (At The End)
Overcome 1,800 Total Stat threshold with 0 Overload penalties
Iota Fragment ×12, Kinetic Core ×4, Resonance Shard ×2
4×4 Symmetrical Quad: Place 2×2 Kinetic Cores in the center, routing 4 orthogonal Iota traces outward. 0 out-of-bounds, 0 disconnected nodes (100% stat retention).
ATK: 1,020 | DEF: 980 | Total: 2,000 (+11.1% over 1,800 requirement)
Mastery II · Mid-Game Fortified (An Aberrant Freedom)
DEF ≥ 1,300 with ≤1 placement penalty (adjusted in v1.0.3 from 1,450)
Refined Iota ×8, Dense Matrix ×3, Prism Alloy ×2
Interlocking L-Grid: Cluster 3 Dense Matrices along the inner perimeter. Allow exactly 1 peripheral edge block out-of-bounds (89% stat retention tier).
ATK: 860 | DEF: 1,340 | Total: 2,200 (Passes DEF 1,300 gate comfortably)
Mastery III · Late-Game Burst (Austere Advisor)
ATK ≥ 1,500 with zero Falsehood and zero Disconnect penalties
Pure Iota Crystal ×15, Overdrive Core ×5, Stellar Dust ×4
5×5 Cross-Resonance Array: Central singularity core distributing power across 4 orthogonal arms. Complete loop closure ensures 0 disconnected pins.
ATK: 1,537 | DEF: 1,537 | Total: 3,074 (+9.7% over 2,800 threshold)
Grandmastery · Full Spectrum Matrix (Dual Resonance)
Grandmastery Challenge III: Total Stat ≥ 3,500 + Universal Advantage
Chroma Iota ×20, Void Relic ×6, Astral Nexus ×2
Bipolar Mirror Matrix: Diagonal dual-core placement at (1,1) and (4,4) separated by a 2-grid neutral buffer lane to avoid magnetic overlap.
ATK: 1,850 | DEF: 1,720 | Total: 3,570 (+15% advantage vs all colors)
Crafting FAQ
When does crafting unlock in In Falsus?
A few hours into Act 1, right after the New Vision story dive — a “Card Crafting Unlocked” banner appears and a guided tutorial craft follows. Before that point, cards only come from story rewards and encounter clears.
What does a recipe decide in In Falsus crafting?
The card itself. The game says it on the Recipes tab: create new, stronger cards through crafting — each recipe determines exactly which card a successful craft produces, and new recipes are found in story entries.
Does it matter which character crafts a card?
Yes. Each girl’s skills shape the craft — Iris carries Expanded Iota Limit and Incremental Tolerances, for example — so the same recipe can finish differently under different crafters. Switch before you place pieces.
How do you get more Iota for crafting?
Story progression, encounter clears and Remembrance replays all pay Iota — the launch-day run had banked over 300 within hours of the unlock. Once an encounter is cleared, its Remembrance replay is the repeatable farm.
Is there a gacha in In Falsus?
No. Cards come from story rewards, encounter clears and crafting — there are no pull rates to beat. A crafting recipe determines exactly which card it produces; your part is placing pieces within tolerance and picking the right crafter, not gambling for drops. Iota for crafting is earned by playing.
How do card mastery challenges work?
They are goal-based crafting challenges that move a card from In Discovery to In Mastery to Mastered, each with its requirement shown in-game. lowiro adjusted one challenge's threshold in the official v1.0.3 patch. No per-challenge walkthrough exists yet; the community's working advice is power/defense cards with cleanly placed, outward-routed Iota.
Related pages
Written for infalsustips.com from our own demo testing and community research. Fact-checked against: In Falsus Wiki (Miraheze) (CC BY-SA 4.0) · In Falsus Wiki (Fandom) (CC BY-SA)
Data reflects demo v0.3.1 · being re-verified on 1.0 · Unofficial fan site — In Falsus © lowiro